How Do Child CPR Steps Change as Kids Get Bigger?
Introduction
As a child care provider you want to know the right steps when a child needs help. This guide explains how #CPR changes as children grow from #infants to bigger #children. It is written for busy directors and teachers in easy language. We include clear numbers, quick lists you can scan, and links to training and resources so you can act with confide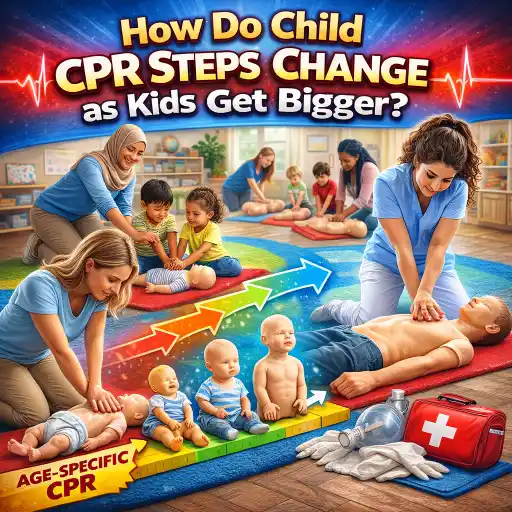 nce. Remember: state requirements vary - check your state licensing agency.
Why it matters: Early, correct action saves lives. Doing the right compressions and breaths for the child’s size keeps blood and oxygen moving until emergency help arrives. ChildCareEd offers training and courses to help your staff practice these skills in real-life scenarios, see why pediatric training matters and course options like in-person and blended classes at ChildCareEd First Aid & CPR Buy Now $95.00$85.00.
How do CPR steps change as children get bigger?
Short answer: the steps are the same, but the method, depth, and hand placement change with size.
- Check safety and response (shout and tap). If unresponsive, shout for help and send someone to call 911.
- Open airway and check breathing. Look for normal breathing — not gasps. If not breathing or only gasping, start CPR immediately.
- Compression rate stays the same: 100–120 compressions per minute for all ages (follow a song like "Stayin' Alive"). See Red Cross guidance: pediatric courses.
- But compression depth changes with size:
- Infants (under 1 year): about 1.5 inches (≈4 cm) or one-third chest depth — use two fingers. See infant details at Drugs.com infant CPR.
- Children (about 1 year to puberty): about 2 inches (≈5 cm) or one-third chest depth — use one hand or two hands depending on size. See child guidance at Drugs.com child CPR.
- Compression-to-ventilation: single rescuer 30:2 for all ages; two rescuers use 15:2 for infants and children when trained (AMBOSS resuscitation).
Practical tip: practice with manikins in training so hand placement and depth become muscle memory. ChildCareEd blended and in-person courses help staff practice these skills: Pediatric First Aid Blended Buy Now $80.00 and In-Person First Aid & CPR Buy Now $95.00$85.00.
How do chest compressions and rescue breaths differ for infants and larger children?
Understanding the differences keeps care effective and safe. Here are the main points in clear steps you can teach staff.
- Hand/finger placement:
- 😊 Infants: pads of two fingers on the sternum just below the nipple line. (Do not press on the very end of the breastbone.)
- 🔸 Small child: heel of one hand on lower half of sternum.
- 🔹 Large child: heel of two hands (one on top of the other) on the lower half of the sternum.
- Compression depth and rate (review):
- Infant: ~1.5 inches / 4 cm (⅓ chest depth).
- Child: ~2 inches / 5 cm (⅓ chest depth).
- All ages: 100–120 compressions per minute and allow full chest recoil. Reference: AMBOSS.
- Rescue breaths:
- Give 2 breaths after 30 compressions (or 15 if two rescuers on infants/children). Each breath ~1 second and just enough to make the chest rise.
- For infants, cover both nose and mouth with your mouth (or mouth to nose and mouth) to seal. For older children, pinch the nose and cover the mouth.
- Single rescuer alone with an infant/child: perform CPR for about 2 minutes before leaving to call 911 if you are the only person present, per standard guidance in lay rescuer instructions (infant, child).
Practice note: hands-only CPR (compressions only) is better than doing nothing if a rescuer is unable or unwilling to give breaths.
When should an AED be used and what size pads do I need?
An AED can be lifesaving during a cardiac arrest. Kids and teens can benefit from an AED — and knowing when and how to use it matters in child care settings.
- When to use: If the child is unresponsive and not breathing normally, start CPR and get an AED as soon as possible. Early defibrillation improves survival for shockable rhythms. Learn more from resources like Nemours and Project ADAM: Nemours on cardiac arrest and Project ADAM.
- Pad size and placement:
- 🩺 Infants under 1 year: use pediatric pads if available. If only adult pads exist, you may use them but follow placement guidance so pads don’t touch each other.
- 🧒 Children 1 year and older: use pediatric pads (if available) until about puberty; otherwise, adult pads are acceptable.
- Follow AED voice prompts and ensure no one touches the child during analysis and shock delivery. Most AEDs automatically adjust energy for children when pediatric pads are used. For more on AED training, see Red Cross courses: Adult & Pediatric First Aid/CPR/AED.
Tip for centers: place an AED in an easily reachable location, train all staff to use it, and include AED checks in your emergency supply list. ChildCareEd provides templates and checklists for emergency supplies and first aid kits: Emergency Supply List and First Aid Kit Checklist.
What can child care programs do to stay ready and avoid common mistakes?
Being prepared reduces fear and improves outcomes. Below are practical steps and common mistakes to avoid.
- Train and rehearse:
- 🎓 Ensure all staff complete pediatric CPR and first aid training regularly (ChildCareEd offers in-person and blended options: In-Person Buy Now
$95.00$85.00, Blended Buy Now $80.00). - 📅 Run regular drills (including choking drills) so responses become automatic; see guidance on why choking drills matter: Choking Drills.
- 🎓 Ensure all staff complete pediatric CPR and first aid training regularly (ChildCareEd offers in-person and blended options: In-Person Buy Now
- Common mistakes & how to avoid them:
- Not checking the scene first — always ensure staff safety before approaching.
- Wrong hand placement or too shallow compressions — practice with manikins and measure depth in training.
- Giving breaths that are too forceful — breaths should just make the chest rise.
- Delay in starting compressions while waiting for help — start compressions immediately if the child is unresponsive and not breathing normally.
- Systems and equipment:
- 🔧 Keep an AED accessible and maintain it (battery and pad checks).
- 🧰 Maintain a first aid kit and emergency supplies — see ChildCareEd checklists: first aid kit and supply list.
- Communication and documentation:
- 📞 Have clear protocols for calling emergency services and notifying families.
- ✍️ After any incident, document what happened and review it with staff to improve responses.
Conclusion
CPR steps for children follow the same life-saving logic for all ages, but hand placement, compression depth, and pad selection change with size. Practice, regular training, and clear center procedures turn knowledge into fast action. Use trusted training like the Red Cross and ChildCareEd courses to keep skills current (Red Cross, ChildCareEd), and remember: state requirements vary - check your state licensing agency. Keep #CPR training on your schedule, carry an AED or have quick access to one, and rehearse choking and CPR drills often — these steps help protect the children in your care.
FAQ (quick):
- Q: Do breaths and compressions change by age? A: Yes — depth and hand technique change; rate stays 100–120/min (infant, child).
- Q: Can I use an adult AED on a child? A: Yes if pediatric pads are unavailable; follow AED prompts and placement rules (Red Cross).
- Q: How often should staff re-certify? A: Follow your training provider and state licensing rules; many courses are every 2 years (ChildCareEd courses).